Hyper-V Best Practices – Optimize Your Virtualization Setup

Hyper-V Best Practices – Optimize Your Virtualization Setup

Virtualization has become an essential component of modern IT infrastructure, enabling organizations to optimize their resources, improve efficiency, and reduce costs. Microsoft Hyper-V, a popular virtualization technology, allows for the creation and management of virtual machines (VMs) on a physical server. It enables multiple operating systems to run simultaneously on the same hardware, providing both flexibility and scalability. In this comprehensive guide, we will explore Hyper-V best practices that will help you get the most out of your virtual environment, ensuring optimal performance, security, and manageability. We will discuss various aspects of Hyper-V, including understanding its architecture, setting it up, configuring hosts, managing storage, optimizing virtual machines, enhancing security, monitoring performance, and more.


hyper-v best practices

Understanding Hyper-V

What is Hyper-V?

Microsoft Hyper-V is a virtualization technology that enables the creation and management of virtual machines on a physical server. It allows multiple operating systems to run simultaneously on the same hardware, providing several benefits, such as cost reduction, increased efficiency, improved flexibility, and simplified management. By leveraging Hyper-V, organizations can consolidate their workloads, reduce their physical server footprint, and improve resource utilization.

Hyper-V Versions

Hyper-V has evolved through several versions since its initial release with Windows Server 2008. Each subsequent version has introduced enhancements and improvements in performance, security, and scalability. The most recent version, Hyper-V on Windows Server 2022, offers several new features and capabilities, such as improved virtual hardware, enhanced virtual network support, and more efficient storage management. Organizations should stay up-to-date with the latest Hyper-V releases to take advantage of new features and improvements


SnapShot Master Power On

Hyper-V Architecture

The Hyper-V architecture is a critical aspect of understanding how the technology works and how to optimize it for maximum performance and efficiency. The architecture consists of three main components: the parent partition, child partitions, and the virtualization stack.

Parent Partition

The parent partition is the primary partition on a Hyper-V host, which runs the Hyper-V hypervisor. It is responsible for managing child partitions and providing them with access to the physical hardware resources. The parent partition has direct access to the hardware and runs the management operating system, typically Windows Server. Administrators interact with the parent partition to configure and manage the virtual environment, create and manage virtual machines, and perform other administrative tasks.

Child Partitions

Child partitions are isolated environments where virtual machines run. Each virtual machine operates within its child partition, which has virtualized access to hardware resources such as CPU, memory, and storage. The child partitions are created and managed by the parent partition, ensuring isolation and resource allocation for each virtual machine.

Virtualization Stack

The virtualization stack is a critical component of the Hyper-V architecture that manages and allocates hardware resources to virtual machines. It is responsible for ensuring that VMs can access hardware resources efficiently and securely. The virtualization stack includes the hypervisor, virtual machine manager, and other components that work together to provide a seamless and efficient virtual environment.

Setting up Hyper-V

Hardware Requirements

Before setting up Hyper-V, it’s essential to ensure that your hardware meets the minimum requirements for running the technology. To run Hyper-V, you need a 64-bit processor with hardware-assisted virtualization and Second Level Address Translation (SLAT). Additionally, you should ensure that virtualization support is enabled in the BIOS of your server. Other factors to consider include the amount of memory and storage capacity required for your virtual environment, as well as the need for high-performance networking components.

Installation Process

Installing Hyper-V involves adding the Hyper-V role to a Windows Server operating system. This can be done through the Server Manager or using PowerShell commands. The installation process requires a server restart, after which you can begin creating and managing virtual machines. It’s essential to follow best practices during the installation process, such as ensuring that the latest updates and patches are applied to the server and that proper hardware and software configurations are in place.


hyperv best practices

Hyper-V Best Practices

Optimizing your Hyper-V environment requires attention to various aspects, such as host configuration, storage management, virtual machine optimization, and security. In this section, we will explore these areas in detail, providing recommendations for best practices that will help you achieve the best possible performance, security, and manageability.

Host Configuration

Hardware Selection

Choosing the right hardware for your Hyper-V host is a crucial aspect of ensuring optimal performance and reliability. Factors to consider when selecting hardware include the processor, memory, storage capacity, and networking components. Investing in high-quality, enterprise-grade hardware components will provide a more stable and reliable virtual environment.

When selecting a processor, consider the number of cores and threads, as well as the clock speed, to ensure sufficient processing power for your virtual machines. Additionally, ensure that the processor supports hardware-assisted virtualization and SLAT.

Memory is another critical factor, as it directly impacts the performance of your virtual machines. Ensure that your server has enough memory to support the number of virtual machines you plan to run, as well as any additional memory requirements for the host operating system and other software components.

Network Configuration

Properly configuring your Hyper-V host’s network settings is essential for improving performance and reducing latency. Key aspects of network configuration include setting up virtual switches, configuring virtual network adapters, and using dedicated network adapters for management and live migration.

Setting up virtual switches involves creating a virtual switch for each physical network adapter on the host. This allows virtual machines to connect to the physical network and communicate with other devices. When configuring virtual network adapters, ensure that they are connected to the appropriate virtual switch and configured with the correct network settings.

Using dedicated network adapters for management and live migration can help to improve performance by isolating these tasks from other network traffic. For instance, you can dedicate one network adapter for host management, another for live migration, and a third for virtual machine communication.

Storage

Storage Types

Selecting the appropriate storage type for your Hyper-V environment is crucial for achieving optimal performance and reliability. There are several storage options available, including local storage, network-attached storage (NAS), and storage area network (SAN). Each storage type has its advantages and disadvantages, so it’s essential to evaluate your needs and budget when making a decision.

Local storage is the simplest and most affordable option, as it involves using the server’s internal storage for virtual machine files. However, it may not offer the best performance or scalability, especially for larger virtual environments.

Network-attached storage (NAS) is a more scalable option, allowing you to connect multiple servers to a centralized storage device over the network. NAS devices typically offer better performance and reliability than local storage but can be more expensive and complex to set up and manage.

Storage area networks (SAN) provide the highest performance and scalability, as they allow for direct, high-speed connections between servers and storage devices. However, SANs can be the most expensive and complex storage option, requiring specialized hardware and expertise to manage effectively.

Storage Configuration

Optimizing your storage configuration is essential for improving performance and ensuring data redundancy. Some best practices for storage configuration include using RAID arrays for fault tolerance, separating storage workloads, and using storage tiering to optimize performance.

RAID arrays can help protect your data in the event of a disk failure, ensuring that your virtual environment remains operational. There are various RAID levels available, each offering different levels of performance and redundancy. Choose the RAID level that best suits your needs and budget.

Separating storage workloads can help improve performance by reducing contention for storage resources. For example, you can store virtual machine configuration files, virtual hard disks, and snapshots on separate storage devices or arrays to minimize the impact of storage-related tasks on the overall performance of your environment.

Storage tiering is another way to optimize performance, as it involves grouping storage devices based on their performance characteristics and automatically moving frequently accessed data to faster storage tiers. This can help to ensure that your most critical data is stored on the fastest available storage, while less frequently accessed data is stored on slower, more cost-effective storage devices.

Virtual Machines

VM Configuration

Properly configuring your virtual machines is essential for optimizing performance and resource utilization. This includes setting the right amount of virtual processors, memory, and storage. Avoid over-provisioning resources to prevent performance issues and ensure that resources are allocated efficiently across all virtual machines.

When configuring virtual processors, it’s important to consider the number of physical processor cores and threads available on the host, as well as the processing requirements of your virtual machines. Over-provisioning virtual processors can lead to performance issues, as it can cause contention for processing resources.

Similarly, when configuring virtual machine memory, ensure that you allocate enough memory for the guest operating system and applications to run smoothly, without over-allocating memory resources. Over-provisioning memory can lead to unnecessary resource contention and reduced performance.

Generation Selection

Choose the appropriate generation for your virtual machines based on their requirements. Generation 1 virtual machines offer legacy support for older operating systems, while Generation 2 virtual machines provide improved performance and support for newer features. To learn more about the differences between Gen 1 and Gen 2 virtual machines, you can refer to this comprehensive guide.

Security

Shielded VMs

Implement Shielded virtual machines to protect sensitive data and ensure the integrity of your virtual machines. Shielded VMs use encryption and secure boot features to protect against unauthorized access and tampering. By leveraging Shielded VMs, you can safeguard your virtual environment from potential security threats and maintain compliance with industry regulations.

Regular Patching and Updates

Ensure that your Hyper-V host, guest operating systems, and applications are regularly patched and updated to protect against security vulnerabilities. This includes applying security updates, hotfixes, and service packs to your host and guest operating systems, as well as updating any third-party applications running within your virtual environment.


Snapshot Master Restart

Monitoring and Management

Proactive Monitoring

To ensure the stability and reliability of your Hyper-V environment, implement proactive monitoring of your host servers, virtual machines, storage, and network resources. Monitoring tools and services can help you identify potential issues before they escalate into more significant problems, allowing you to take corrective action promptly.

Monitoring should include tracking CPU, memory, and storage usage, as well as network traffic and latency. By setting up alerts and notifications for specific events or thresholds, you can receive timely information about the health and performance of your virtual environment.

Centralized Management

Utilize centralized management tools and solutions to simplify the administration of your Hyper-V environment. Centralized management allows you to manage and monitor multiple Hyper-V hosts and virtual machines from a single interface, reducing the complexity of managing your virtual infrastructure.

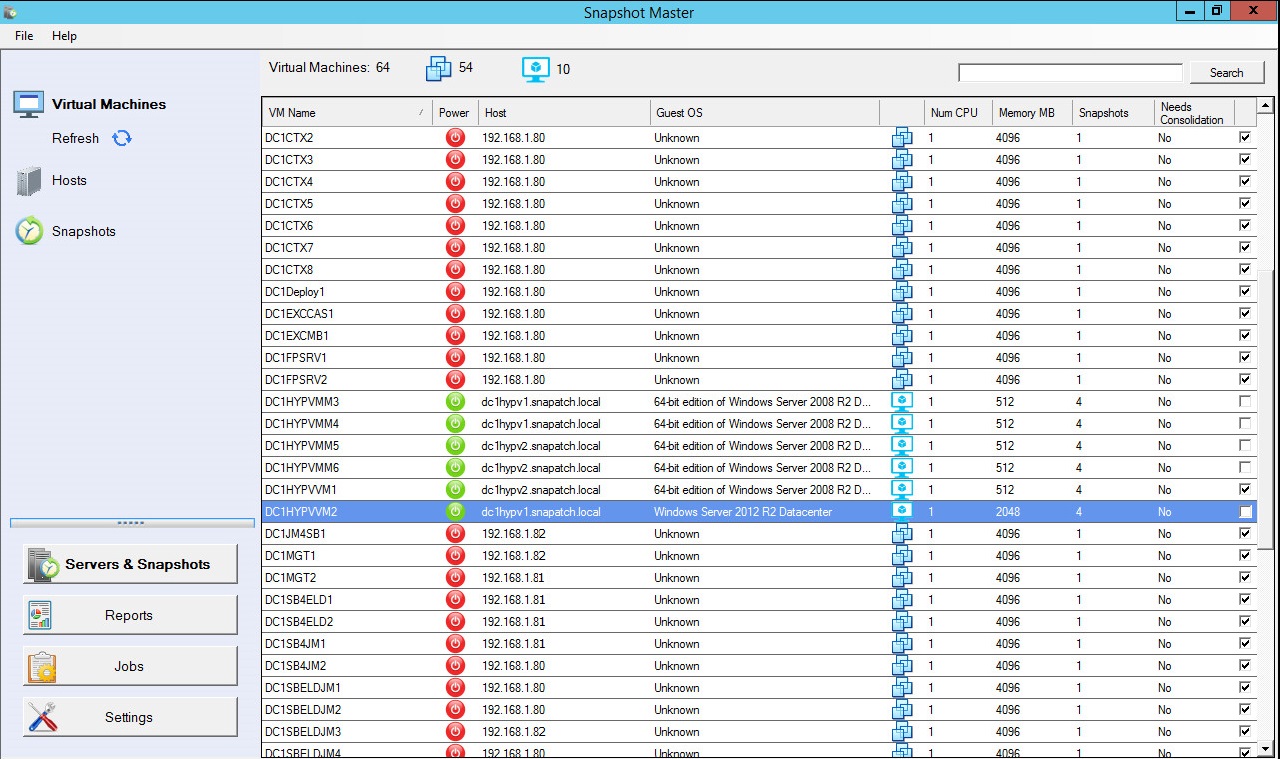
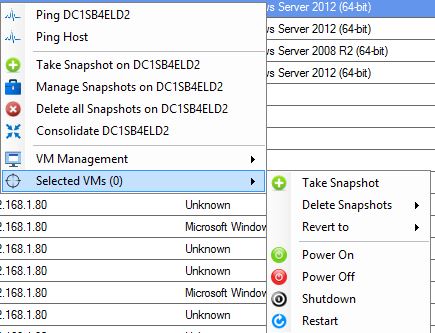
Tools like System Center Virtual Machine Manager (SCVMM) and SnapShot Master can help you manage and automate various tasks, such as creating, configuring, and deleting virtual machines, managing storage, and configuring networking. By leveraging centralized management tools, you can improve efficiency and reduce the potential for errors in your virtual environment.

Backup and Disaster Recovery

Implementing a robust backup and disaster recovery strategy is essential for protecting your virtual environment and ensuring business continuity in the event of a disaster or data loss. Regularly backing up your Hyper-V host, virtual machines, and their associated data will enable you to recover your environment quickly and with minimal downtime.

When developing a backup strategy, consider the use of incremental backups, which only capture changes made since the last backup, to reduce storage requirements and improve backup performance. Additionally, test your backups regularly to ensure that they can be restored successfully in the event of an emergency.

For disaster recovery, consider using replication and failover technologies to create redundant copies of your virtual machines and data, allowing you to quickly recover your environment in the event of a disaster. Hyper-V Replica is a built-in feature that enables you to replicate virtual machines between Hyper-V hosts, while other third-party solutions are also available for more advanced disaster recovery capabilities.

Optimizing Hyper-V Networking

Virtual Machine Queue (VMQ)

To optimize network performance for your virtual machines, enable Virtual Machine Queue (VMQ) on your Hyper-V host’s network adapters. VMQ is a feature that offloads the processing of network traffic from the host’s processor to the network adapter, reducing the CPU overhead and improving network throughput.

To enable VMQ, ensure that your network adapters support this feature and that it is enabled in the adapter’s settings. Additionally, configure the number of processor cores and memory resources allocated to VMQ based on your host’s hardware and network requirements.

Receive Side Scaling (RSS)

Receive Side Scaling (RSS) is another feature that can help improve network performance in your Hyper-V environment. RSS enables the network adapter to distribute incoming network traffic across multiple processor cores, reducing the CPU overhead and improving overall network throughput.

To enable RSS, ensure that your network adapters support this feature and that it is enabled in the adapter’s settings. Additionally, configure the number of processor cores and memory resources allocated to RSS based on your host’s hardware and network requirements.


hyperv

Hyper-V Conclusion

Following Hyper-V best practices is essential for optimizing the performance, security, and manageability of your virtual environment. By paying close attention to host configuration, storage management, virtual machine optimization, and security, you can ensure that your Hyper-V environment is operating at its full potential. As virtualization technology continues to evolve, staying up-to-date with the latest best practices and advancements in Hyper-V will help you maintain a reliable, high-performing, and secure virtual environment.

Frequently Asked Questions (FAQs)

What is the difference between Generation 1 and Generation 2 virtual machines in Hyper-V?

Generation 1 virtual machines offer legacy support for older operating systems, while Generation 2 virtual machines provide improved performance and support for newer features, such as UEFI firmware, secure boot, and larger virtual disk capacities.

Can I mix different storage types in my Hyper-V environment?

Yes, you can use a combination of local storage, NAS, and SAN storage in your Hyper-V environment, depending on your needs and budget. Each storage type has its advantages and disadvantages, so it’s essential to evaluate your requirements carefully when selecting storage solutions.

What are the hardware requirements for running Hyper-V?

To run Hyper-V, you need a 64-bit processor with hardware-assisted virtualization and Second Level Address Translation (SLAT) support. Additionally, you should ensure that virtualization support is enabled in the BIOS of your server. Other factors to consider include the amount of memory and storage capacity required for your virtual environment, as well as the need for high-performance networking components.

How can I improve the performance of my virtual machines in Hyper-V?

To improve the performance of your virtual machines, ensure that you allocate the appropriate amount of virtual processors, memory, and storage. Avoid over-provisioning resources to prevent performance issues and ensure that resources are allocated efficiently across all virtual machines. Additionally, follow best practices for storage configuration, such as using RAID arrays for fault tolerance, separating storage workloads, and implementing storage tiering.

  1. What are Shielded VMs, and why should I use them?

    Shielded virtual machines are a security feature in Hyper-V that protects sensitive data and ensures the integrity of your virtual machines. They use encryption and secure boot features to protect against unauthorized access and tampering. By implementing Shielded VMs, you can safeguard your virtual environment from potential security threats and maintain compliance with industry regulations.

Hyper-V vs VMware: A Comprehensive Comparison

Hyper-V vs VMware: A Comprehensive Comparison

Introduction to Virtualization Technologies

Virtualization has become an essential aspect of modern computing. By creating a virtual version of a computing resource, such as hardware, storage, or an entire operating system, virtualization allows businesses to optimize resource utilization, streamline management, and reduce costs. Two of the most popular virtualization platforms in the market are Microsoft’s Hyper-V and VMware’s vSphere. In this article, we will provide a comprehensive comparison of these two virtualization giants to help you decide which platform best suits your needs.

What is Hyper-V?

Hyper-V is a virtualization technology developed by Microsoft, which allows multiple operating systems to run concurrently on a single physical machine. It stands for “Hyper-Virtualization” and is a feature of Microsoft’s Windows Server operating system, though it is also available in some editions of Windows client operating systems, such as Windows 10 Pro and Windows 11 Pro.

With Hyper-V, users can create and manage virtual machines (VMs) that run different operating systems, such as Windows, Linux, and others, all sharing the same hardware resources. This enables greater efficiency in hardware utilization, improved application availability, and easier management of resources. Hyper-V is commonly used in data centers and enterprise environments to consolidate workloads, run legacy applications, and support disaster recovery scenarios.

Some key features of Hyper-V include:

  1. Virtualization of hardware: It allows the physical resources of a server, such as CPU, memory, and storage, to be shared across multiple virtual machines, optimizing hardware utilization and reducing costs.
  2. Isolation: Each virtual machine operates in its own isolated environment, ensuring that the activity of one VM does not affect the performance or stability of other VMs on the same host.
  3. Live Migration: This feature enables the seamless movement of running virtual machines from one Hyper-V host to another, without any downtime or disruption to the VMs.
  4. Dynamic Memory: Hyper-V allows the dynamic allocation of memory to virtual machines, enabling more efficient use of available resources and improved performance.
  5. Snapshots: Hyper-V supports the creation of snapshots, which are point-in-time representations of a virtual machine. This feature allows for easy rollback to a previous state in case of issues or for testing purposes.

What is VMware?

VMware is a global leader in virtualization and cloud infrastructure solutions, founded in 1998. The company develops a wide range of software and services that enable businesses to create, manage, and run virtual machines (VMs) on a single physical server or across multiple servers. These VMs can host different operating systems and applications, which allows for better hardware utilization, simplified management, and increased flexibility.

VMware’s flagship product is VMware vSphere, which consists of two main components:

  1. VMware ESXi: ESXi is a Type-1 hypervisor that provides the foundation for virtualization. It is installed directly on the physical server and acts as a platform for creating and managing VMs. ESXi is responsible for allocating hardware resources, such as CPU, memory, and storage, to each VM while maintaining isolation between them.
  2. VMware vCenter Server: vCenter Server is a centralized management solution that enables the administration of multiple ESXi hosts and their respective VMs from a single interface. It offers features such as VM provisioning, performance monitoring, high availability, and disaster recovery.

Some key features of VMware solutions include:

  1. High availability: VMware vSphere provides automatic failover and load balancing of VMs, ensuring minimal downtime and optimal performance in case of hardware failures or maintenance.
  2. Live Migration (vMotion): VMware allows administrators to move running VMs from one host to another with zero downtime, providing flexibility in managing resources and maintenance tasks.
  3. Storage vMotion: This feature enables the live migration of VM disks from one storage device to another, without impacting the VM’s availability.
  4. Distributed Resource Scheduler (DRS): DRS automatically balances workloads across multiple hosts, ensuring optimal resource allocation and performance for all VMs.
  5. Network virtualization (NSX): VMware NSX is a software-defined networking solution that allows for the creation and management of virtual networks, providing enhanced security and flexibility.

VMware’s virtualization products are widely used in enterprise environments, data centers, and cloud computing services to consolidate workloads, improve application availability, and streamline management.

Comparison of Key Features

Performance

Both Hyper-V and VMware are known for their high performance and efficient resource utilization. VMware has historically had an edge in this area, but recent updates to Hyper-V have significantly closed the gap. With support for nested virtualization, dynamic memory allocation, and advanced networking features, both platforms can deliver excellent performance to meet the needs of various workloads. Ultimately, the performance of your virtual environment will largely depend on your underlying hardware and the proper configuration of your virtual infrastructure.

Scalability

Scalability is another crucial aspect to consider when comparing virtualization platforms. Both Hyper-V and VMware support large-scale virtual environments, but there are some differences in terms of their maximum supported configurations. VMware vSphere supports up to 480 logical processors, 12TB of RAM, and 64 nodes per cluster, while Hyper-V supports up to 320 logical processors, 4TB of RAM, and 64 nodes per cluster. While these numbers may vary depending on the specific edition and version of each platform, it’s clear that VMware offers greater scalability for larger deployments.

Security

Security is a top priority for any IT infrastructure, and virtualization platforms are no exception. Both Hyper-V and VMware offer robust security features, including virtualization-based security, secure boot, and support for TPM (Trusted Platform Module) devices. Additionally, both platforms provide encryption for VM data and network traffic, ensuring the confidentiality and integrity of your data. However, VMware’s vSphere has a more mature security ecosystem, with a larger selection of third-party security solutions and integrations available.

Management and Integration

Managing your virtual environment is a critical task, and both Hyper-V and VMware offer powerful management tools to help you accomplish this. Hyper-V comes with Hyper-V Manager and System Center Virtual Machine Manager (SCVMM), while VMware offers vCenter Server and vSphere Client. Both platforms provide comprehensive management capabilities, including snapshot management, VM scheduling, and remote access via RDP or PowerShell.

In terms of integration with other platforms and services, both Hyper-V and VMware have extensive support for public cloud services like Microsoft Azure and Amazon Web Services. However, Hyper-V has a native advantage when it comes to integration with other Microsoft products, such as Active Directory, System Center, and Office 365.

Licensing and Pricing

Licensing and pricing are important factors to consider when choosing a virtualization platform. Hyper-V has a more straightforward licensing model compared to VMware. The standalone Hyper-V Server is available for free, while the Hyper-V role is included in the Windows Server license. Additional costs for Hyper-V come from System Center licensing for advanced management features.

VMware, on the other hand, has a more complex licensing structure, with several editions of vSphere available at different price points. VMware vSphere licensing is based on the number of physical processors in your servers and the features you require. Additionally, vCenter Server licensing is required for centralized management.


SnapShot Master Home Screen

Managing Virtual Snapshots.

SnapShot Master is a powerful tool that complements both Hyper-V and VMware virtualization platforms, providing a centralized solution for managing virtual machine (VM) snapshots, checkpoints, and data stores. In this section, we will explore the benefits of integrating SnapShot Master with your Hyper-V or VMware environment.

  • Unified Management Interface: SnapShot Master interfaces with VMware’s vCenter, Microsoft’s System Center Virtual Machine Manager (SCVMM), and Microsoft Azure, giving you a comprehensive view of your virtual environment. This unified interface simplifies the management of your VMs across multiple platforms, streamlining the process of creating and managing snapshots, checkpoints, and data stores.
  • Automated Snapshot Scheduling: SnapShot Master allows you to schedule snapshot creations and deletions, ensuring that you have consistent and up-to-date backups of your virtual machines. This automation helps reduce the risk of data loss and provides a more reliable recovery process in case of failures or disasters.
  • Power Management and Remote Access: With SnapShot Master, you can easily manage your virtual machines by scheduling power on and off operations, ensuring optimal resource utilization and energy efficiency. Additionally, you can connect to your VMs remotely via RDP or PowerShell, enabling you to perform maintenance tasks, troubleshoot issues, or access your virtual workloads from anywhere.
  • Consolidating VM Snapshots: SnapShot Master provides an efficient way to consolidate VM snapshots, helping you optimize storage usage and maintain optimal performance. Consolidating snapshots can help you reduce storage overhead, simplify management, and minimize the impact of snapshots on your virtual environment’s performance.
  • Email Notifications and Reporting: SnapShot Master allows you to automate and schedule reporting of your virtual servers and VMware or Hyper-V environments via email. You can receive email notifications and reports related to snapshot creation, deletion, and other critical events, helping you stay informed and aware of your virtual environment’s status and health.

Integrating SnapShot Master with your Hyper-V or VMware environment can significantly enhance your virtualization management experience, providing a comprehensive, automated, and efficient solution for managing your virtual machines and their associated snapshots, checkpoints, and data stores.


Schedule VM Snapshot Selection

Use Cases and Recommendations

Small and Medium-Sized Businesses

For small and medium-sized businesses, Hyper-V is often the more cost-effective option due to its simpler licensing model and integration with other Microsoft products. Additionally, Hyper-V’s performance and management capabilities are more than sufficient for most SMB workloads.

Large Enterprises

For large enterprises with complex and demanding virtual environments, VMware vSphere may be the better choice due to its greater scalability, more mature security ecosystem, and extensive third-party integrations. However, the higher licensing costs and complexity should be taken into account.

Cloud Providers

For organizations looking to build a multi-cloud or hybrid cloud environment, both Hyper-V and VMware have strong integration capabilities with major cloud providers like Microsoft Azure and Amazon Web Services. Choosing between the two platforms will depend on your specific requirements, existing infrastructure, and familiarity with each platform.

High Availability and Disaster Recovery

High availability and disaster recovery are essential components of any IT infrastructure, especially for mission-critical applications. Both Hyper-V and VMware offer solutions for ensuring high availability and facilitating disaster recovery.

Hyper-V provides built-in support for failover clustering, allowing you to create a cluster of multiple Hyper-V hosts for high availability. In the event of a host failure, VMs running on the failed host are automatically migrated to another host in the cluster. Hyper-V also supports replica functionality, allowing you to create a copy of a VM on another Hyper-V host for disaster recovery purposes.

VMware offers a suite of high availability and disaster recovery features as part of its vSphere product. VMware High Availability (HA) automatically restarts VMs on another host in the cluster if a host fails. VMware Fault Tolerance (FT) goes one step further, providing continuous availability for VMs by running a secondary copy of the VM on another host in lockstep with the primary VM. For disaster recovery, VMware offers Site Recovery Manager (SRM), a comprehensive solution for orchestrating and automating the recovery of VMs in case of a site failure.

Networking and Storage

Networking and storage are critical aspects of any virtualization platform. Both Hyper-V and VMware offer a range of networking and storage features to meet the needs of diverse workloads.

Hyper-V supports virtual switches, network virtualization, and advanced networking features such as Quality of Service (QoS) and bandwidth management. Hyper-V also offers a variety of storage options, including support for local storage, Storage Area Networks (SANs), and Network Attached Storage (NAS). Additionally, Hyper-V supports Storage Spaces Direct, a software-defined storage solution that allows you to build highly available and scalable storage systems using local storage on Hyper-V hosts.

VMware vSphere provides a rich set of networking features, such as distributed virtual switches, network I/O control, and support for software-defined networking (SDN) solutions like VMware NSX. VMware’s storage capabilities include support for local storage, SANs, NAS, and vSAN, a software-defined storage solution that enables the creation of high-performance and resilient storage clusters using local storage on ESXi hosts.

Backup and Recovery

Having a robust backup and recovery strategy is vital for protecting your virtual environment from data loss and downtime. Both Hyper-V and VMware offer a range of backup and recovery options, as well as support for third-party backup solutions.

Hyper-V includes built-in support for VM snapshots and checkpoints, allowing you to create point-in-time copies of your VMs for backup and recovery purposes. It is important to note that VMware snapshots are not meant to be used as a long-term backup solution but can be a useful tool for short-term recovery needs.

VMware vSphere also supports VM snapshots, as well as more advanced backup and recovery features like VMware Data Protection (VDP), a built-in backup solution that leverages vSphere APIs for Data Protection (VADP). There is also a wide array of third-party backup solutions available for both Hyper-V and VMware, such as Veeam, Altaro, and Acronis, which offer advanced backup and recovery features tailored for virtual environments.


Carbon Azure Migration Progress Screen

Migrating to and from the Cloud

The ability to migrate workloads to and from the cloud is an important consideration for many organizations. Both Hyper-V and VMware offer robust support for migrating VMs to and from public cloud platforms like Microsoft Azure and Amazon Web Services (AWS).

Hyper-V includes built-in support for Azure Site Recovery (ASR), a cloud-based disaster recovery solution that can also be used for migrating VMs to Azure. Additionally, there are tools and guides available for migrating Hyper-V VMs to AWS, such as AWS Server Migration Service (SMS) and Azure VMs to VMware migration checklist.

VMware offers a range of cloud migration tools and services, such as VMware Cloud on AWS, which allows you to run your VMware workloads natively on the AWS infrastructure. VMware also provides the Hybrid Cloud Extension (HCX) for migrating VMs between on-premises vSphere environments and cloud platforms like Azure, AWS, and Google Cloud Platform (GCP).

Use Carbon if you want to migrate your Azure VMs back to either your VMware or Hyper-V environment easily and quickly.


Carbon Azure VM Details

Ecosystem and Community Support

A strong ecosystem and community support can be a deciding factor for many organizations when choosing a virtualization platform. Both Hyper-V and VMware have well-established ecosystems and active user communities.

Hyper-V benefits from being a part of the larger Microsoft ecosystem, with strong integration with other Microsoft products and services. The Hyper-V community is active and growing, with numerous forums, blogs, and online resources available for learning and troubleshooting.

VMware has a more mature ecosystem, with a vast array of third-party integrations, plugins, and management tools available to enhance its virtualization offerings. VMware’s community is one of the largest and most active in the virtualization space, with numerous forums, user groups, and online resources available for learning and support.

Conclusion

In summary, both Hyper-V and VMware offer powerful virtualization platforms with a range of features to suit different needs. When deciding between the two, consider factors such as performance, scalability, security, management and integration, licensing and pricing, use cases, and ecosystem and community support. For small and medium-sized businesses, Hyper-V may be the more cost-effective and convenient option due to its simpler licensing model and integration with other Microsoft products. On the other hand, large enterprises with complex and demanding virtual environments may prefer VMware vSphere for its greater scalability, more mature security ecosystem, and extensive third-party integrations.

Ultimately, the best virtualization platform for your organization will depend on your specific requirements, existing infrastructure, and familiarity with each platform. By carefully evaluating the features, benefits, and drawbacks of both Hyper-V and VMware, you can make an informed decision that best meets the needs of your organization.

Frequently Asked Questions

Can I run both Hyper-V and VMware on the same physical server?

No, you cannot run both Hyper-V and VMware on the same physical server as they are both Type-1 hypervisors that require direct access to the hardware resources. However, you can use nested virtualization to run one hypervisor inside a VM running on the other hypervisor, although this setup is typically used for testing and experimentation purposes.

Can I migrate my existing VMs from one platform to the other?

Yes, you can migrate your existing VMs from Hyper-V to VMware and vice versa using various tools and methods. Some of these tools include VMware vCenter Converter, Microsoft Virtual Machine Converter (MVMC), and third-party solutions like Veeam and StarWind V2V Converter.

Can I use both Hyper-V and VMware in a mixed virtual environment?

While it is technically possible to use both Hyper-V and VMware in a mixed virtual environment, doing so can increase the complexity of managing and monitoring your virtual infrastructure. If you choose to use both platforms, it is essential to have proper management and monitoring tools in place that can handle the heterogeneous environment.

Is it possible to use Hyper-V on non-Windows platforms?

No, Hyper-V is a Microsoft technology and is only available on Windows Server and Windows 10 operating systems. If you need to run VMs on non-Windows platforms, you should consider using other virtualization solutions like VMware, KVM, or Xen.

Which virtualization platform has better support for containers?

Both Hyper-V and VMware have support for containers, but the level of support and integration varies between the platforms. Hyper-V has native support for Windows containers and integrates with Docker through the Docker Engine for Windows. VMware supports containers through its vSphere Integrated Containers (VIC) and VMware Tanzu offerings, which provide container runtime and orchestration capabilities within the vSphere environment.

How do performance and resource overhead compare between Hyper-V and VMware?

Both Hyper-V and VMware have made significant improvements in performance and resource efficiency over the years. While the performance differences between the two platforms may be minimal for most workloads, VMware has historically been considered to have a slight edge in performance, particularly for high-performance workloads. However, Hyper-V has made considerable strides in recent years, and the performance gap between the two platforms continues to narrow.

In terms of resource overhead, both platforms strive to minimize the impact on the host system’s resources. VMware’s ESXi hypervisor is known for its small footprint and efficient resource utilization, while Hyper-V also boasts a lightweight design, particularly in the case of the standalone Hyper-V Server. It is important to evaluate the performance and resource overhead of each platform within the context of your specific workloads and hardware configurations.

How does security compare between Hyper-V and VMware?

Both Hyper-V and VMware offer a range of security features to protect your virtual environment. Hyper-V has several security features built into the Windows platform, such as BitLocker encryption, Secure Boot, and Device Guard. Additionally, Hyper-V supports Shielded VMs, which provide an extra layer of protection for sensitive workloads by encrypting the VM’s state and data.

VMware also offers a robust set of security features, including VM Encryption, Secure Boot, and vSphere Trust Authority (vTA) for centralized management of trusted hosts. Furthermore, VMware has a more mature security ecosystem, with a vast array of third-party security solutions available to enhance the platform’s security capabilities.

While both platforms provide strong security features, it is essential to implement a comprehensive security strategy that includes securing the host systems, network, and storage, as well as regularly updating and patching your virtualization platform.

How do I choose between Hyper-V and VMware for my organization’s virtualization needs?

Selecting the right virtualization platform for your organization will depend on several factors, such as:

  • Performance and scalability requirements
  • Integration with existing infrastructure and software
  • Licensing and pricing considerations
  • Familiarity and expertise with each platform
  • Support for specific use cases, such as high availability, disaster recovery, and cloud migration
  • Ecosystem and community support

It is essential to carefully evaluate the features, benefits, and drawbacks of both Hyper-V and VMware in the context of your organization’s specific needs and resources. By conducting a thorough assessment, you can make an informed decision that best suits your organization’s virtualization requirements.

What are some best practices for managing and maintaining a virtual environment on either Hyper-V or VMware?

Regardless of the virtualization platform you choose, following some best practices can help ensure the smooth operation and maintenance of your virtual environment:

  • Regularly monitor and optimize the performance of your virtual environment, including host systems, VMs, networking, and storage.
  • Implement a comprehensive backup and recovery strategy to protect your VMs and data from loss and downtime.
  • Regularly update and patch your virtualization platform and guest operating systems to address security vulnerabilities and enhance stability.
  • Implement strong security measures, such as network segmentation, encryption, and access controls, to protect your virtual environment.
  • Leverage management and automation tools to simplify the administration of your virtual infrastructure and improve efficiency.
  • Continuously invest in training and knowledge development for your IT staff to ensure they are proficient in managing and troubleshooting your virtualization platform.

Can I use Hyper-V and VMware in a hybrid cloud or multi-cloud environment?

Yes, both Hyper-V and VMware offer robust support for hybrid cloud and multi-cloud environments. Hyper-V has native integration with Microsoft Azure, allowing you to easily extend your on-premises virtual environment to the Azure public cloud.

Similarly, VMware offers various tools and services for hybrid cloud and multi-cloud scenarios, such as VMware Cloud on AWS, Azure VMware Solution, and Google Cloud VMware Engine. These solutions allow you to run your VMware workloads natively on public cloud infrastructure, enabling seamless integration between your on-premises and cloud environments.

When considering a hybrid cloud or multi-cloud strategy, it’s essential to evaluate the compatibility and integration between your virtualization platform and the public cloud providers you plan to use. Both Hyper-V and VMware offer strong support for the major public cloud platforms, but it’s crucial to consider factors such as workload portability, management and monitoring, security, and cost optimization when designing your hybrid or multi-cloud architecture.

How does licensing and pricing compare between Hyper-V and VMware?

Licensing and pricing can be a significant factor in choosing a virtualization platform. Hyper-V is available as part of the Windows Server operating system, and its licensing is included with the Windows Server license. This means that organizations already using Windows Server can deploy Hyper-V at no additional cost. Additionally, Microsoft offers a free, standalone version of Hyper-V Server, which provides core virtualization features but lacks some advanced features and integration with other Microsoft products.

VMware, on the other hand, uses a per-socket licensing model for its vSphere platform. Organizations must purchase a license for each physical CPU socket in their servers. VMware offers various vSphere editions, each with different feature sets and pricing levels, allowing organizations to choose the edition that best meets their needs and budget. While VMware’s licensing model can be more expensive than Hyper-V’s, the additional features and capabilities offered by VMware may justify the higher cost for some organizations.

What are the main differences between Hyper-V and VMware in terms of networking capabilities?

Both Hyper-V and VMware offer a range of networking features for virtual environments, but there are some differences in their capabilities and implementations.

Hyper-V provides support for virtual switches, VLANs, NIC teaming, and virtual network adapters. It also offers extensible switch capabilities, allowing third-party vendors to develop plugins and extensions for the virtual switch. Additionally, Hyper-V supports Software-Defined Networking (SDN) through integration with Microsoft’s Azure Stack HCI and System Center Virtual Machine Manager (SCVMM).

VMware vSphere includes a more extensive set of networking features, such as distributed virtual switches, network I/O control, and support for SDN solutions like VMware NSX. VMware’s distributed virtual switch (vDS) enables centralized management and configuration of virtual switches across multiple ESXi hosts, providing more advanced features and granular control over network traffic than the standard virtual switches offered by Hyper-V.

Can I manage both Hyper-V and VMware environments using a single management tool?

While it is possible to manage both Hyper-V and VMware environments using a single management tool, doing so typically requires using third-party solutions that support both platforms. Examples of such tools include Veeam ONE, SolarWinds Virtualization Manager, and ManageEngine OpManager.

These third-party management tools can provide a unified interface for managing and monitoring your mixed virtual environment, offering features like performance monitoring, capacity planning, and alerting. However, using a single management tool for both platforms may not provide the same level of integration and functionality as using the native management tools for each platform, such as Hyper-V Manager or VMware vCenter.

How do I decide which type of virtual disk format to use for my VMs on Hyper-V or VMware?

Choosing the right virtual disk format for your VMs depends on factors like performance, storage efficiency, and compatibility with your virtualization platform. Hyper-V supports two main types of virtual disk formats: VHD and VHDX. VHD is the older format and has some

limitations, such as a maximum size of 2TB and lack of support for advanced features like online resizing. VHDX is the newer format and offers better performance, support for larger disk sizes (up to 64TB), and additional features like online resizing and data corruption protection. For most Hyper-V deployments, using the VHDX format is recommended.

VMware supports several virtual disk formats, including VMDK, VHD, and VHDX. The VMDK format is native to VMware and offers the best compatibility and performance for VMware environments. VMware also provides support for thin provisioning and thick provisioning, allowing you to choose the disk allocation method that best meets your storage efficiency and performance requirements.

When deciding on a virtual disk format, it’s essential to consider factors like compatibility with your virtualization platform, performance requirements, and storage efficiency. In most cases, using the native virtual disk format for your platform (VHDX for Hyper-V and VMDK for VMware) is recommended.

How do Hyper-V and VMware support automation and scripting?

Automation and scripting are essential for efficient management and operation of your virtual environment. Both Hyper-V and VMware offer support for automation and scripting through various tools and APIs:

  • Hyper-V:
    • PowerShell: Hyper-V includes a comprehensive set of PowerShell cmdlets that allow you to automate and script various management tasks, such as creating and managing VMs, configuring virtual switches, and performing live migrations.
    • System Center Orchestrator: Microsoft’s System Center Orchestrator provides a powerful automation platform that integrates with Hyper-V and other System Center components, enabling you to create complex automation workflows and runbooks.
  • VMware:
    • PowerCLI: VMware provides a powerful set of PowerShell cmdlets called PowerCLI, which allows you to automate and script various management tasks in VMware vSphere environments, such as creating and managing VMs, configuring virtual networks, and managing vSphere clusters.
    • vSphere Automation SDK: VMware offers a set of APIs and SDKs for automating and integrating with vSphere, including REST APIs, Python libraries, and other language bindings.

When implementing automation and scripting in your virtual environment, consider the ease of use, flexibility, and integration with your existing tools and processes.

How do Hyper-V and VMware handle resource allocation and overcommitment?

Resource allocation and overcommitment are essential aspects of managing a virtual environment, as they help ensure optimal performance and efficient use of hardware resources. Both Hyper-V and VMware offer various mechanisms for controlling resource allocation and overcommitment:

  • Hyper-V:
    • Dynamic Memory: Hyper-V includes a feature called Dynamic Memory, which allows you to automatically adjust the amount of memory assigned to VMs based on their current usage, helping to improve overall memory utilization.
    • Resource Pools: Hyper-V supports creating resource pools, which enable you to allocate specific amounts of CPU, memory, and storage resources to groups of VMs, ensuring that each group receives its fair share of resources.
  • VMware:
    • Resource Pools and Reservations: VMware vSphere allows you to create resource pools and set reservations, limits, and shares for CPU, memory, and storage resources, providing granular control over resource allocation and ensuring that VMs receive the resources they need.
    • Memory Overcommitment: VMware vSphere includes advanced memory management techniques, such as transparent page sharing, ballooning
    • , and memory compression, that allow you to overcommit memory resources, improving overall memory utilization and enabling you to run more VMs on a single host without sacrificing performance.

      Both Hyper-V and VMware provide you with the tools and features necessary to manage resource allocation and overcommitment effectively. When configuring resource allocation in your virtual environment, consider factors like performance requirements, hardware constraints, and the specific needs of your virtual machines and workloads.

How do Hyper-V and VMware handle live migrations and VM mobility?

Live migration and VM mobility are crucial for maintaining high availability, load balancing, and flexibility in your virtual environment. Both Hyper-V and VMware offer support for live migrations and VM mobility through various features and technologies:

  • Hyper-V:
    • Live Migration: Hyper-V includes support for live migrations, which allows you to move running VMs between Hyper-V hosts with minimal downtime and no loss of network connections. Hyper-V supports different types of live migrations, such as shared-nothing live migration and storage live migration.
    • Storage Spaces Direct: Microsoft’s Storage Spaces Direct technology enables you to create a software-defined storage solution that supports Hyper-V VMs, providing greater flexibility and mobility for your virtual workloads.
  • VMware:
    • vMotion: VMware vSphere includes a feature called vMotion, which allows you to move running VMs between vSphere hosts with no downtime. vMotion supports various types of migrations, such as shared storage vMotion, storage vMotion, and cross-vCenter vMotion.
    • VMware vSAN: VMware’s vSAN technology is a software-defined storage solution that integrates with vSphere, providing a highly flexible and scalable storage platform for your virtual workloads.

When evaluating live migration and VM mobility capabilities in Hyper-V and VMware, consider factors like ease of use, performance, and integration with your existing infrastructure and storage solutions.

How do Hyper-V and VMware handle network virtualization and software-defined networking (SDN)?

Network virtualization and software-defined networking (SDN) are essential components of modern virtual environments, providing greater flexibility, scalability, and security for your virtual workloads. Both Hyper-V and VMware offer support for network virtualization and SDN through various features and technologies:

  • Hyper-V:
    • Virtual Switches: Hyper-V includes support for creating and managing virtual switches, which allow you to connect VMs to physical networks or create isolated virtual networks for your workloads.
    • Network Virtualization: Hyper-V supports network virtualization using technologies like NVGRE and VXLAN, enabling you to create multi-tenant virtual networks that can span multiple physical networks.
    • Software-Defined Networking (SDN): Microsoft’s SDN solution, which is part of Windows Server and System Center, provides a comprehensive set of tools and features for managing and automating your virtual networks, including network virtualization, network controllers, and load balancing.
  • VMware:
    • Virtual Switches: VMware vSphere includes support for creating and managing virtual switches, which enable you to connect VMs to physical networks or create isolated virtual networks for your workloads.
    • VMware NSX: VMware’s NSX technology is a full-featured SDN solution that integrates with vSphere, providing advanced features like network virtualization, micro-segmentation, and load balancing.

When evaluating network virtualization and SDN capabilities in Hyper-V and VMware, consider factors like ease of use, scalability, security, and integration with your existing infrastructure and network solutions.

Understanding Hyper-V Checkpoints: A Comprehensive Guide

Understanding Hyper-V Checkpoints: A Comprehensive Guide

Hyper-V is a virtualization platform developed by Microsoft that allows users to create and manage virtual machines (VMs) on Windows operating systems. One of the features of Hyper-V is checkpoints, which allow users to capture the state of a VM at a particular point in time.

Hyper-V checkpoints are essential for many tasks, such as testing software in a safe and isolated environment, creating backups of virtual machines, and rolling back a virtual machine to a previous state if something goes wrong. However, understanding Hyper-V checkpoints and how to use them effectively can be challenging, especially for beginners.

In this article, we will provide a comprehensive guide to understanding Hyper-V checkpoints, including what they are, how they work, and their benefits and drawbacks. We will also provide some best practices for using Hyper-V checkpoints.

What are Hyper-V Checkpoints?

A Hyper-V checkpoint, also known as a snapshot, is a point-in-time image of a virtual machine’s state, including its memory, virtual disks, and configuration files. Checkpoints are useful for creating backups of virtual machines or testing software in an isolated environment without affecting the production environment.

Hyper-V checkpoints capture the virtual machine’s state at a particular moment, allowing you to revert the virtual machine to that state later if needed. This can be especially helpful when you need to test software, apply updates or configuration changes, or perform other maintenance tasks.

How do Hyper-V Checkpoints Work?

When you create a Hyper-V checkpoint, the virtual machine’s current state is saved as a differencing disk. The differencing disk records all the changes made to the virtual machine’s state after the checkpoint was taken. This allows the virtual machine to continue running normally while you make changes or updates to the virtual machine.

If you need to revert the virtual machine to the checkpoint state, Hyper-V will discard the differencing disk and use the checkpoint’s saved state to restore the virtual machine to that point in time.

Benefits of Hyper-V Checkpoints:

Hyper-V checkpoints offer several benefits, including:

Easy to create:

Creating a checkpoint is a straightforward process and can be done with just a few clicks in the Hyper-V Manager.

Time-saving:

Hyper-V checkpoints can save you time by allowing you to quickly revert a virtual machine to a previous state if something goes wrong during testing or maintenance.

Safe testing environment:

Hyper-V checkpoints allow you to create a safe testing environment for software, updates, or configuration changes without affecting the production environment.

Easy backups:

Hyper-V checkpoints can be used to create backups of virtual machines quickly and easily.

Drawbacks of Hyper-V Checkpoints:

Hyper-V checkpoints also have some drawbacks, including:

Increased disk space usage:

Checkpoints require additional disk space to store the differencing disk, which can quickly add up if you take frequent checkpoints.

Performance impact:

Creating and using checkpoints can have a performance impact on the virtual machine. This impact can be more noticeable on high-performance virtual machines or during heavy I/O operations.

Incompatibility with some applications:

Some applications or services may not work correctly with Hyper-V checkpoints, particularly those that rely on time-sensitive operations or write-intensive I/O operations.

Common Issues and Troubleshooting Steps Related to Hyper-V Checkpoints

Issue Troubleshooting Steps
Unable to create a checkpoint
1. Make sure the virtual machine is turned off.
2. Check the storage location for available space.
3. Verify that the virtual machine configuration is compatible with checkpoints.
Unable to apply a checkpoint
1. Make sure the virtual machine is turned off.
2. Check the virtual machine configuration to ensure it matches the configuration of the checkpoint.
3. Try deleting and recreating the checkpoint.
Unable to delete a checkpoint
1. Make sure the virtual machine is turned off.
2. Check if the checkpoint is being used by another process.
3. Try deleting the checkpoint using PowerShell.
Performance issues after applying a checkpoint
1. Check the virtual machine’s resource utilization.
2. Consider using production checkpoints instead of standard checkpoints.
3. Check the storage location for available space.

Hyper-V Checkpoints FAQs

Question Answer
Where are Hyper-V snapshots stored?
Hyper-V snapshots are stored as .avhd or .avhdx files on the same storage location as the virtual hard disk.
What is the advantage of using snapshots?
The main advantage of using snapshots is the ability to quickly restore a virtual machine to a previous state. This can be useful in situations where a change or update causes issues, allowing the VM to be rolled back to a known-good state.
Do snapshots slow down VM performance?
Yes, taking and using snapshots can potentially slow down VM performance. This is because each snapshot adds an additional layer of disk I/O, which can impact performance.
How do Hyper-V snapshots work?
Hyper-V snapshots capture the state of a virtual machine at a specific point in time, including memory, virtual hard disks, and settings. These snapshots are stored as .avhd or .avhdx files, and can be used to quickly restore the VM to a previous state if needed.
Does Hyper-V support multiple snapshots?
Yes, Hyper-V supports taking multiple snapshots of a virtual machine. However, it’s generally recommended to limit the number of snapshots to avoid performance issues and potential disk space limitations.
What is the difference between Hyper-V snapshot and backup?
Hyper-V snapshots capture the state of a virtual machine at a specific point in time, while backups capture the entire VM and its associated configuration. Backups are typically used for disaster recovery purposes, while snapshots are used for short-term changes or updates.
Is it safe to delete Hyper-V snapshots?
Yes, it’s generally safe to delete Hyper-V snapshots. However, it’s important to understand that deleting a snapshot will merge the changes made since the snapshot was taken into the base virtual hard disk, which can potentially take a long time and impact VM performance. It’s also recommended to have a backup of the VM before deleting any snapshots.

How best to manage your Hyper-V Checkpoints:

  1. Question Answer
    What is Snapshot Master?
    Snapshot Master is a tool that enables users to manage their virtual machine snapshots, checkpoints, and datastores for VMWare, Hyper-V, and Azure. It allows users to view snapshot information, schedule snapshot creations or deletions, and receive email notifications and reports.
    What virtual environments can Snapshot Master work with?
    Snapshot Master can interface with VMWare’s vCentre, Microsoft’s System Centre Virtual Machine Manager (SCVMM) (Hyper-V), and Microsoft Azure.
    What functionality can Snapshot Master provide for virtual machine snapshots?
    With Snapshot Master, users can create and delete snapshots on a schedule for single or multiple virtual machines. They can choose to snapshot the VM’s memory and quiesce the file system, manage all snapshots of their VMs, consolidate their VMs snapshots, revert the snapshot of each VM, and delete snapshots (delete all, delete all except most recent, delete all larger than (X)). Users can also receive email reports of their snapshot schedules and reminders that their snapshots will automatically delete.
    What virtual machine management functionality does Snapshot Master offer?
    Snapshot Master allows users to schedule the power off and power on of a single or multiple virtual machines, remotely connect to a VM via Remote Desktop (RDP) directly from the Snapshot Master console, ping each VM, ping each VMWare or HyperV host, connect to the VM’s Computer Management Console, and execute Remote Powershell.
    What kind of reporting can Snapshot Master automate and schedule?
    Snapshot Master can automate and schedule reporting of virtual servers and VMware or Hyper-V environments emailed directly to users, including all virtual machines with snapshots, all snapshots larger than (X), all snapshots older than (X) days, all snapshots, all snapshots with creator, snapshots on specific virtual machines, all virtual machines, virtual machines with alerts, virtual machines created in the last (X) days, virtual machines removed in the last (X) days, virtual machines with less than (X)% free space, all virtual machines with creation dates and creator, virtual machines without VMware tools, not running or out of date, all hosts report, all hosts with alerts, top 5 hosts with most used memory, number of virtual machines per datastore, and datastores with less than (X)% free space.
    How can Snapshot Master simplify managing virtual machine snapshots?
    Snapshot Master provides scheduling, email notification, and reporting features that make it easier to manage virtual machine snapshots. It allows users to consolidate VMs snapshots, revert VMs to their previous states, and manage virtual machines from the console.
    What are the benefits of using Snapshot Master for virtual machine snapshots?
    Snapshot Master provides an efficient and streamlined process for managing virtual machine snapshots, which can save time and reduce the risk of errors. Its scheduling, email notification, and reporting features provide greater visibility and control over virtual machine snapshots.
    How does Snapshot Master compare to other virtual machine snapshot management tools?
    Snapshot Master offers a comprehensive set of features for managing virtual machine snapshots, including scheduling, email notification, and reporting. It supports multiple virtual environments, including VMWare and Hyper-V.
    Is there a free trial for Snapshot Master?
    Yes, Snapshot Master offers a 30-day free trial for users to try out its features and functionality.
    Is customer support available for Snapshot Master?
    Yes, Snapshot Master offers customer support to assist users with any questions or issues they may encounter.
    How can I get started with Snapshot Master?
    Users can visit the Snapshot Master page to download a free trial and start managing their virtual machine snapshots more efficiently.

Best Practices for Using Hyper-V Checkpoints:

To use Hyper-V checkpoints effectively, follow these best practices:

Plan checkpoint usage:

Plan your checkpoint usage carefully to avoid excessive disk usage and minimize the performance impact on your virtual machines.

Use checkpoints for testing only:

Use checkpoints for testing software or making changes to your virtual machine’s configuration. Avoid using them for long-term backups

Limit checkpoint lifetimes:

Avoid keeping checkpoints for extended periods as they can quickly consume disk space and affect performance. Instead, delete checkpoints once they are no longer needed.

Use standard checkpoints for short-term use:

Use standard checkpoints for short-term use, such as testing or configuration changes. These checkpoints use less disk space and have less impact on performance than production checkpoints.

Use production checkpoints for long-term use:

Use production checkpoints for long-term use, such as creating backups of virtual machines. These checkpoints capture the virtual machine’s state and configuration files, making them more suitable for long-term use.

Monitor disk space usage:

Monitor disk space usage regularly to ensure that checkpoints do not consume too much space and impact performance.

Test applications with checkpoints:

Before using checkpoints in a production environment, test them with your applications and services to ensure compatibility and performance.